Quick + Easy DIY Valentines!

Valentine’s Day is just 1 week away, and if you’re still looking for a fun and unique idea for your kiddos’ to bring to their class parties, or just to give to their friends, I’ve got you covered 😉

These DIY Valentine’s are super simple, affordable, and candy-free! All you need is some paper (card stock works best,) a printer, and a toy that corresponds to the cards you’re printing (will share links below!)

Since Aria and all her friends are really into these little squishy toys these days, I decided to order a pack from Amazon, and attach them to the back of her cute little Valentine card.

And since Shiloh is (and always has been) ALL about the vehicles, we just grabbed some pullback cars from Walmart’s party section, and used some rolled up tape to affix the car to the “road.”

Super simple, affordable, and fun!

Click below to download my Valentine’s Day Card printables below and make your own!

>> I squish you a Happy Valentine’s Day

>> You’re a wheelie good friend

Wishing you and yours a Happy Valentine’s Day! ❤️

Amanda

Free Mother's Day Craft

Mother’s Day looks a little different for us all this year, but one thing we shouldn’t have to miss out on are the crafts from our cuties! So I’ve teamed up with Steph (@norx _in_the_know on Instagram,) to bring you this fun + simple Mother’s Day craft. Just download, print, and let your kiddos imagination run wild 🙌🏻

Download Yours Here

Happy Mother’s Day, to all the Mamas out there! ❤️

Creating Your Online Course In Less Than 30 Days

You’ve probably noticed online courses are everywhere these days…

The ability to learn something without having to leave your home (or your seat, for that matter,) is becoming increasingly popular. And for good reason.

A quality course will usually offer perks such as lifetime access, the ability to pause, rewind, and rewatch as many times as you want, and a plethora of downloadable resources that provide even more great content.

Even further, online courses give you (the student,) the ability to choose when it’s most convenient for you to learn, so you never have to make excuses like, “I just don’t have time…” anymore.

As I have become fully immersed in the world of online courses, I have become more and more convinced that this is the way of the future — at least when it comes to supplemental education.

Don’t get me wrong, I LOVE the classroom. I have a Masters degree, and I’ve even toyed with the idea of going back to school again once my kiddos are just a little older… but when it comes to acquiring new skills or simple lessons that don’t require a professor with a PhD, I’m all about hittin’ that download button and watching while I package orders, or fold laundry.

But what about the other side to all of this?

Something most of us probably don’t consider while reaping the benefits of the amazing online courses available these days is just how much work was put in by the instructor

You might watch a class that fits perfectly within the confines of 2 hours, with loads of great, organized content, and a perfectly manicured web-page, but what takes us just 2 hours to consume, probably took about 2 months (or more) to develop.

The truth is, online course creation is not for the faint of heart. And if there’s anything I’ve learned through the process of creating and launching my own course, it’s that you have to be truly passionate about what you’re creating, or it just won’t work.

Maybe you’re reading this post and you have some ideas of your own brewing… or perhaps you’ve never even considered launching your own online course, but after reading this you’re thinking, “yeah, I might be able to do that…”

Wherever you fall on the gamut of interest, if you’re passionate enough and knowledgable enough about a particular subject, you can absolutely create an online course and share that beautiful wisdom with the world — And I want to help you do it!

Just click here to grab your free Online Course Launch Guide, to help you get started on your way — and feel free to drop your questions or comments below!

Here’s to creating more things we’re passionate about in 2020.

Cheers,

Amanda

What To Expect From New Online Calligraphy Course

The wait is over!

My new online calligraphy course, Modern Calligraphy: Basics & Beyond is now open for registration!

This course will officially begin in mid-January 2020, and is packed with all the information I have learned over the past 5 years as a professional calligrapher. From technique, to practical application, if you’re ready to learn calligraphy for real, and add some great tools to your pocket (like envelope addressing, and creating unique place cards,) this is the place for you!

The course content will be available mid-January 2020, and registration will be only be available at the early-bird price until the course officially begins -- so head on over to grab your seat in the course now, and take advantage of the early bird discount!

Take me to the course!

The course comes with unlimited access to 15 video modules, 14 downloadable worksheets and handouts, and access to an exclusive Facebook group for members only!

Head on over to the website to learn more!

Hope to see you there,

Amanda

Why Calligraphy Isn't Going Anywhere

You might have noticed modern calligraphy has been trending for the last 7+ years, with traditional roots that stem even further beyond that.

But if you haven’t yet had the opportunity to learn, you’re probably wondering if you missed your chance, or if it’s too late to jump in now…

The reality is, modern calligraphy is just our current expression of an art form that has been around for thousands of years.

Yes, thousands.

And just like virtually everything else in this world, we have adapted a tradition to fit our culture and time more appropriately.

Calligraphy has been used all over the world, dating back as early as 600 BC, as a means of communication and visual art, and has remained an important facet of culture since then — even with modern advances, such as the printing press.

So even though design trends come and go, and styles of calligraphy change over the years, calligraphy itself isn’t going anywhere.

Although my style has changed slightly over the course of the last 5 years, custom calligraphy remains to be my most requested (and profitable,) facet of business.

From wedding invitations and day-of stationery, to business logos and signage, modern calligraphy can be found almost everywhere you look — and I love that!

It began as an artful way of communicating, and it remains to be just that…

So if you’re on the fence about learning, or consider yourself a “newbie,” take heart! You are in the company of countless artists, and an age-old tradition that has (and will continue to) stand the test of time.

Ready to get started yet? Download my free traceable “Brush Calligraphy Alphabet” here, and make sure you’re on my insider list for more details on my online course launch!

Cheers,

Amanda

The Key to Making an Income as a Calligrapher (and a little freebie at the end!)

It’s been almost 5 years since I started my own business as an artist.

What began as simply offering calligraphy services, has since morphed into a full-service design studio.

And even though I now offer a wider variety of services, and have worked with some incredible companies, believe it or not, calligraphy is where I still make the majority of my income.

Though the rise of modern calligraphy fonts has changed the industry somewhat, there is still no replacement for hand-written.

Think about it for a minute — when you receive something that is hand-written, do you feel the same as if something was typed and printed, or simply sent via email? I know I don’t. That’s because something that was written by hand communicates thoughtfulness and care in a way that an email or printed piece of paper never could.

“So what does this have to do with making an income as a calligrapher?”

I’m glad you asked…

There’s one day, more than other days, where people really want to communicate thoughtfulness and caretheir wedding!

(And if you don’t believe me, ask the 53 billion dollars that was spent on weddings in the U.S. in 2018!)

Weddings are a big deal, and even though I’m all for a good DIY project, when it comes to their wedding day, many couples opt for the convenience of hiring a professional.

From place cards and envelopes, to signage and stationery, calligraphy for weddings comes into play in so many ways.

Though trends rise and fall, and styles may change, I am a firm believer that calligraphy in the wedding industry is here to stay.

And this isn’t just wishful thinking…

Over the years, I’ve braced myself for the decline in demand for calligraphy, and I’ve only been met with surprise and continued growth on the wedding side of my business.

So whether you’re already a calligrapher by trade, or looking to start your own calligraphy business - don’t leave weddings out of the mix!

Not only is it a great way to build a foundation of income, but it is incredibly rewarding to see the joy your work brings to so many people on such a special day.

Now, you might have just read this and feel inspired to start building the wedding side of your business, but don’t know where to start… Don’t worry, I’ve got you covered!

Click here to download my free PDF - 3 Steps To Landing Your Next Wedding Client, and get ready to watch your income grow!

-Amanda

5 Things I Wish I Knew Before Starting My Creative Business

Starting your own creative business is not an easy task. Though often glamorized by social media and the #hustle revolution, the reality is… it’s HARD. WORK.

And while I am absolutely an advocate of going for it (hello - I’m doing it myself!) I can’t stand by and talk about the sunshine and rainbows without letting you in on the gloomy, muddy mess that is sometimes entrepreneur life.

So, without further ado, here’s my list of 5 things (although there are many more!) I wish I knew before starting my own creative business:

1) You will wear many hats - This should go without saying, but when you’re starting your own business, unless you’ve taken out a loan, or have investors in your corner, you will be doing everything yourself. And this doesn’t just mean creating and putting out the product you’re selling. We’re talking branding, website, social media, pricing, financials, packaging, shipping, ordering materials, customer service, marketing plans, future product planning… all under the umbrella of your coveted “CEO” title ;)

2) You will work long hours - This is a big one… While many people leave their jobs to “work for themselves,” I think we tend to underestimate just HOW MUCH work it takes to run a successful business. So when you’re first starting out, you should expect to work more than your typical 9-5 job… but be encouraged that it shouldn’t be this way forever. If you’ve got a good plan in place, and are willing to put in the work in the beginning, you should eventually be in a place where you can hire others to help lighten your load, and even work on that “passive income” stream (more on this later.)

3) You will think about quitting - I’ve spent 4 years building my business, and at least *thought* about quitting once a month… but the keyword here is “thought.” Because even though there have been challenging moments and days when I’ve felt completely worthless, there are at least a dozen other moments where I am more fulfilled in my work than ever before… which leads me to my fourth point…

4) You just might find what you have been looking for your entire life - And this is what has kept me going all these years. I have found myself regularly saying phrases like, “I can’t believe this is my job,” and “How do I get paid to do this?!” It might be crazy to imagine, but it happens…. just not by accident.

Which leads me to my final, most important point…

5) Launching well is KEY - Unfortunately, this is something I did not fully understand before putting my work out into the world. I was just excited, eager, and ready to go! If you find yourself in the same place, don’t worry - it’s okay! But if there’s anything I’ve learned over the past few years, it’s this: you only get one launch. So if you spend time doing the work before you launch your business out into the world, you will not only have anticipation built within your audience, but you’ll be ready for the challenges that will come your way, because you’ve planned for them. (Not to mention, once you begin to receive orders, or requests for work, it’s a lot more difficult to squeeze in the foundational work that comes in with a well-planned launch.)

Now, I know all of this sounds like it’s a lot of work… and it is! HOWEVER, you don’t have to figure it all out on your own. I’ve put together a Creative Business Launch Checklist to help guide you as you begin the process of planning - so you can do it well from the start!

Just remember, you’re not in this alone, and there are countless others who were once in your shoes, ready to share the knowledge they’ve learned in their own creative pursuits… you can totally do this!

And don’t forget your checklist ;)

-Amanda

Untitled_Artwork 6 copy.jpg


My Business Story

IMG_0017.jpg

5 years ago, I was preparing to become a mother for the first time. I had begun to build a career in college admissions and marketing, but my desire to be home, raising my future children far outweighed any of my own plans for success in the workplace. 

Now, I’ve always been one to strive for success, and I actually love working (when it’s the right kind of work,) but I didn’t see how I could have both. 

Fast-forward a few months, and there I was… “living the life” as a stay-at-home mom, with a 5-month old daughter who, so far, didn’t seem to enjoy much of anything (read: she was really fussy and mad all the time.)

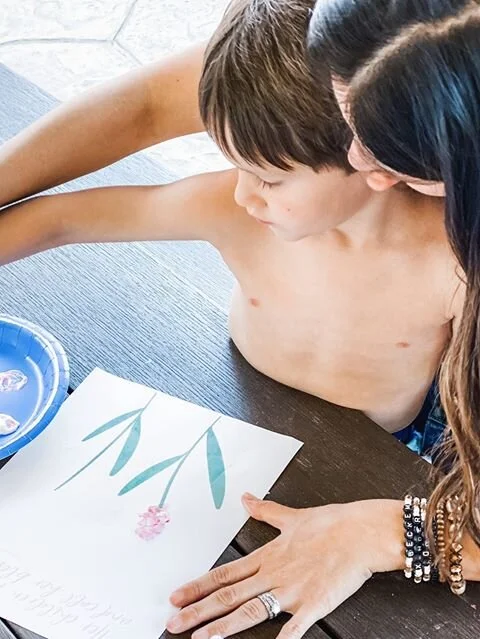
After many months of this difficult stage, I was urged by my mom to get out of the house for a little bit and take a creative class with her. The class was an Introduction to Brush Lettering, and it took me about .5 seconds to realize it was something really special.

I went home and practiced as much as my life would allow, took additional courses in pointed pen calligraphy, illustration, and watercolor art, and found myself smack dab in the middle of what I felt like I should have been doing my entire life.

My new-found creative hobby quickly turned into a business, and all of a sudden I had a new vision for the future that was more exciting than I ever imagined. 

I couldn’t believe I was making money doing something that brought so much life to my soul. I mean, people actually paid me (and still do,) to write their name pretty, or paint some flowers?! Talk about a dream come true… And yes, I still pinch myself.

It hasn’t always been the smoothest ride… I’ve encountered a great deal of challenges along the way, made too many mistakes to count, and have lost money on failed product ideas over the years… but overall, I’m so proud of how far I’ve come and what I’ve learned over these last 4 years as a creative entrepreneur. 

Along the way, I’ve worked on hundreds of weddings, taught thousands of students, launched my own collection of removable wallpaper designs through Loomwell, and SO MANY MORE THINGS.

I’ve learned (for the most part) how to balance life as a “mompreneur,” and even on the most stressful days, I remind myself that THIS is what I signed up for. And I am so thankful I did. 

As my business continues to grow, and I continue to encounter others who are fresh on their own creative path, I can’t help but get excited - because I know the potential.

I’ve been on the other side of the fence, looking over… just dreaming of booking my first wedding client or teaching my first workshop. (And, let’s be honest, I never even DREAMED I would have wallpaper and fabric designs in people’s homes across the world!) But now I’m privileged to look back, see the mistakes for the beautiful lessons they were, and cheer others along the way — because there’s so much more for you than you can even imagine.

Maybe you’re reading this and you’ve just made a huge mistake that cost you a lot of money, or perhaps you’ve just whet your appetite by taking your first workshop or investing in quality art supplies… wherever you may find yourself on your journey toward running your own creative business, I want you to know I am with you, and I believe in you.

From someone who’s been there, been through it, and come out alive and kicking on the other side… know that whatever dreams you have for your creative business are possible, if you’re willing to work for it. 

Be encouraged in the truth that you are not alone. You might not even know where you’re headed, but I can assure you there’s a reason you started, and there’s so much good ahead if you just keep going

Untitled_Artwork 6.jpg


In it with you,

Amanda


(P.S. If you’re not already, make sure you subscribe to my newsletter below! I’ll be announcing some exciting opportunities soon, with first access available to those on my email list!)

I Love Italy // Io Amo L'Italia

IMG_0082 2.JPG

Ah, Italy. A place full of history, beauty, and charm at every turn. Where the carbs abound (hello, pasta, pizza, and gelato!) and the cappuccinos are mostly foam (Italians love their foam!) If you’re considering a trip there yourself, have been there before, or simply want to live vicariously through our trip - you’re in the right place!

When Josh and I decided to start saving for a trip to Europe, 3 years ago, we quickly decided that Italy was the place we wanted to visit most. After much research and polling all our friends who had been there before, we decided on 3 destinations: Rome, Florence, and Cinque Terre. This turned out to be the perfect combination of historic landmarks, incredible food, breathtaking art, and some of the most beautiful sights we’ve ever seen.

While it may have been a little bit easier to purchase our trip through a third-party tour group, we decided to do all the planning ourselves to get the full experience. And I’m so glad we did! Planning this trip ourselves meant we were not only able to do whatever we wanted, when we wanted, but we learned so much in the process. From navigating the train system, to figuring out how to not stand in a line for hours to see the coliseum, we came home with some invaluable knowledge that we are excited to have in our pocket for future trips. And lucky you - I’m going to share it all here, too!

First Stop: Rome

Treve Fountain

Treve Fountain

Having never been to Rome, (let alone Italy for that matter,) it was hard to know exactly where to stay for our trip. We did tons of research on the areas that would be centrally located to all we wanted to see, and in a safe area, and our research led us to Argentina Residenza. We snagged an awesome deal through Priceline, and were blown away by the beauty of this place — we would stay there again in a heartbeat! It was located within walking distance to the Pantheon, Treve Fountain, and Trastevere, and tucked away nicely off the street so we felt both secure, and not in the center of all the busyness.

IMG_0041.JPG

When in Rome, we did our best to take in the city by walking almost everywhere. From the historic sights, to the incredible food, we accomplished quite a bit in our few days there. Our first night in Rome, we decided to make our first stop coffee… because, have you met my husband?

Sant'Eustachio Il Caffè

Sant'Eustachio Il Caffè

We found one of the more popular coffee bars in Rome, and were given a quick lesson in Italian coffee culture. One of the first things you’ll notice in Italy, is the people don’t really sit and sip their coffee. In fact, the only people you’ll see doing that are probably tourists. In Italy, you walk up to the bar, order your drink (which is almost always espresso or a cappuccino,) and drink it while standing at the bar. There are often tables available outside of the coffee shops, but if you want to sit there and have your coffee, you must make that clear when you order because it costs more to sit at the tables.

After we were properly fueled, we took a quick walk over to the Pantheon. This was our first of many experiences seeing ancient Roman architecture in person, and it was astounding. I will say it many times here, but the grand nature of everything you see in Rome will take your breath away!

The Pantheon

The Pantheon

After a quick glance at Yelp, we decided to try a highly recommended restaurant, Pietro al Pantheon, for our first Italian meal. Nestled in a side street just steps from the Pantheon, this place was our first introduction to the classic Roman dish, Cacio e Pepe, and OH. MY. GOODNESS. I can’t say much more aside from you MUST try it!

We hated it.

We hated it.

After dinner, we found one of the best gelato shops in Rome - Giolitti (Thanks again, Yelp!) This place has been making gelato for over 100 years, and they have got it DOWN! It was, by far, the best gelato I had while in Italy… And once we found this place, we may or may not have gone back 3 times…

Ok… We did.

Gelato at Giolitti

Gelato at Giolitti

From the research we had done beforehand, we knew some of the most popular landmarks could have you waiting in line for hours if you didn’t purchase tickets in advance. So, with a little planning on our first night there, we purchased tickets and a tour of the Vatican for the next day, and tickets to the Forum & Coliseum for the following day. Once we arrived to each of these places, we quickly realized how important this step was! It only took a few moments, and we easily saved 2-3 hours of waiting in line at each place. Don’t miss this tip.

The Vatican

The Vatican

Touring the Vatican was such an incredible experience. The history all throughout the museum and the the grandeur of St. Peter’s Basilica left us speechless at times. And, even though it took about 3 hours to tour the entire place, we loved having a tour guide to explain everything we were seeing - because there was so much!

While near the Vatican, we found one of the only specialty coffee shops in Rome, Pergamino. Because specialty coffee isn’t much of a thing in Italy yet, this place was definitely one of a kind for Rome. But if you are a coffee connoisseur like us, it’s definitely worth trying! They make pour overs, Aeropress, syphons, and more… and they even let you choose from a wide selection of beans. This was one of our favorite coffee finds on the whole trip!

Random hot Italian man, sipping coffee at Pergamino.

Random hot Italian man, sipping coffee at Pergamino.

The next day, we had tickets to see the Coliseum and Roman Forum. Talk about breathtaking! We were blown away by the scale of both monuments and how these were built thousands of years ago, before any of the technology we have today - and still standing! Walking through the Coliseum was such a surreal experience… knowing everything that went on there, and the millions of people who have walked through that place before us. And don’t even get me started on the Forum. Pictures don’t even begin to do these places justice. You just have to see them for yourself!

The Coliseum.

The Coliseum.

Tip: When you walk through the Forum, there will be a place near the center where you can climb a bunch of stairs and get a bird’s eye view of the place. Definitely do that.

Before I move on to our next stop, here are a few more noteworthy mentions from Rome:

Emma Pizzeria - Amazing pizza, (the Prosciutto pizza is the bomb,) Cacio e Pepe, and deconstructed cannoli for dessert.

Roscioli Caffe - Great for breakfast, coffee, and pastries.

Cantina e Cucina - Great pizza and Cacio e Pepe!

Next Up: Cinque Terre

IMG_0099.JPG

After a busy few days in Rome, we made our way to Cinque Terre for a little change of pace, and stayed one night in Vernazza (one of the “five lands.”) I was worried one night wouldn’t be enough, but I was pleasantly surprised to find that it was plenty of time to take it all in. We took an early train from Rome and arrived in Vernazza by 10am. The city appeared to just be waking up, and we quickly learned just how small each of these villages truly are. We immediately booked a private boat tour (just walk down to the dock and book in person,) and had some of the best meals on our entire trip here (welcome to the birthplace of pesto and focaccia!) If you visit Vernazza specifically, you must eat at Il Pirata delle Cinque Terre. (Order the Pesto Bruschetta, and the Pesto Ravioli... You’re welcome.)

Pesto Ravioli at Il Pirata delle Cinque Terre

Pesto Ravioli at Il Pirata delle Cinque Terre

When late afternoon came, it was time to board our private boat tour - which was one of my favorite aspects of the entire trip! For just about 100 Euro, we were able to see all 5 lands from the water, with our own private tour guide. The entire tour was about an hour and a half, and worth every euro!

IMG_0076.JPG
The Italian Riviera - water like you’ve never seen.

The Italian Riviera - water like you’ve never seen.

Our awesome tour guide.

Our awesome tour guide.

After our boat tour, we made our way to Trattoria de Sandro for dinner, and had Pesto Lasagna for the first time ever - what?! Between the fresh pesto and the homemade focaccia we encountered while in Vernazza, Josh and I would both easily say we had some of our favorite meals in Cinque Terre. If you are visiting Italy and have an extra day to fill, don’t miss this beautiful place.

Tip: I was not entirely thrilled with the AirBnB we booked here, so I won’t share that info. But what I will say, is after visiting for ourselves, we both felt it would have easily been fine as a day trip from Florence. If you do decide to stay the night in one of the villages, be prepared for stairs - and LOTS of them!

And, finally: Florence!

IMG_0119 2.JPG

After the busyness of Rome, and the peaceful nature in Cinque Terre, Florence was the perfect way to tie a bow on our dream vacation. We left Vernazza on an early train, made a quick pitstop in Pisa (because… The Leaning Tower!) and arrived in Florence by early afternoon.

*Tip: if you want to see the Leaning Tower while traveling through Pisa, there is a place that will store your luggage for only 5 euro for the entire day. It is completely legit (requires your passport to drop off and pick up,) and will be a huge weight off your shoulders (literally) so you can enjoy the walk from the train station to the Leaning Tower.

The AirBnB we stayed at while in Florence was a DREAM! It was everything I’d imagined an authentic Italian apartment to be, with a private patio, perfect for an afternoon painting sesh. Our hosts were so gracious, and gave us great tips on where to eat and what to do while in the city. I hope to go back one day just so we can stay in this lovely place again. But anyway, on to Florence!

Pizza at Mamma Napoli

Pizza at Mamma Napoli

For our first meal in the city, we made our way to Mercato Centrale (Central Market,) where there are a bunch of shops and restaurants. We shared a pizza at Mamma Napoli (SO GOOD,) and spent the rest of the evening wandering the city. In our wandering, we stumbled upon the beautiful Ponte Vecchio bridge (which is now one of my favorite sights IN THE WORLD,) and made our way across the bridge for some AMAZING gelato at Gelateria La Carraia.

Ponte Vecchio Bridge

Ponte Vecchio Bridge

On the way back to our apartment, I found the sweetest hole-in-the-wall shop with some of the most beautiful olive wood pieces I’ve ever seen. The shop owner didn’t speak very much English, but certainly wasn’t lacking in kindness and hospitality. I got some of my favorite souvenirs and gifts here, and felt like I could’ve stayed for hours just browsing all the beautiful pieces. If you’re looking for authentic Italian souvenirs (that don’t feel like “souvenirs”,) please do yourself a favor and make a stop at La Bottega Del Chianti!

La Bottega del Chianti

La Bottega del Chianti

While we’re on the topic of shopping… make sure you save shopping money for this city. Florence is known as a city of the arts, so you will find some of the most beautiful, authentic Italian keepsakes in this city. Hand painted ceramics, hand carved olive wood, genuine leather pieces… they are all beautiful here, and will make for some of the best souvenirs to remember your trip!

From the breathtaking architecture and plethora of artists and artisans lining each street, to the museums… oh the MUSEUMS! This place is every artists dream, and probably my favorite of all the places we visited. But of all our moments there, near the top of my list is seeing Michelangelo’s Statue of David, located at the Galleria dell'Accademia. It’s hard to put into words this experience, but it was a moment I can literally say took. my. breath. away. Don’t miss this!

Shameless selfie with David…

Shameless selfie with David…

And if you’re a coffee lover, like me and the hubs, make your way to Ditta Artigianale for some of the best coffee you will find in Italy. There are two locations, but our favorite of the two was the location just south of the river. Also just south of the river, was our FAVORITE pizza in Italy! Gusta Pizza! The line can get a little crazy, but trust me when I say - it is WORTH THE WAIT for this one.

Ditta Artigianale

Ditta Artigianale

And one of my favorite tips from a friend of ours (thanks, Kyle) was a tiny sandwich shop called Il Buffalo Trippone. O.M.G. You guys… just go there and order the Wild Boar Salami Truffle Sandwich… you’re welcome.

IMG_0136.JPG

While I feel like I could write a novel on the city of Florence, I’ve got to pull the reins back somewhere… just make sure it’s on your “must visit” list in Italy, and if you end up there, here are a few more spots you shouldn’t miss:

Piazzale Michelangelo - A bit of a climb, but worth it for the best view of Florence.

The Duomo - Pay attention to the dates this is closed, and make a reservation well in advance if you want to climb to the top!

Santa Croce - A beautiful church/museum where Michelangelo and Gallielo (among many others) are buried.

Uffizi Gallery - One of the best museums in Florence… So much art!

IMG_0124.JPG

*Tip: if you are planning to visit any museums while in Florence, I highly recommend getting a Firenzecard. This will not only save you money in the long run, but it often allows you to skip to the front of the line most places (and we all know TIME is a precious commodity when traveling.) Also pay attention to the dates certain places are closed, as each museum is closed on different days of the week.

Our Last Night

IMG_0046.JPG

When the time came for our trip to end, we began the trek back to Rome to be near the airport for our flight early the next morning. Because the airport is about a 30 minute train ride from the main city in Rome, we thought it best to stay at an AirBnb in Fiumicino (the city where the airport is located.) While this was nice the morning of our flight, I wouldn’t necessarily recommend it. There isn’t really much to do in Fiumicino, and because we arrived so early in the day, we ended up taking an Uber to the main city in Rome to enjoy our last day there. If we were to do it again, I think we would have chosen to stay in Rome for our last night instead; especially given that we were pros at the Italian train system by this time!

*Tip: when traveling by train, you will purchase a ticket to your destination with or without a specific time listed. If there is no time listed on your ticket, make sure you validate it at the machine just before boarding your train, to avoid heavy fines!

Ciao, Italia!

IMG_0033 2.JPG

All in all, we were extremely pleased with the trip we planned for ourselves. We saw it all, ate it all, and felt like we had an incredible Italian experience. If you’re planning a trip for yourself, be encouraged that you can do it. It takes some research and effort on the front side, but it will be worth it - I promise!

I hope this is helpful information for my fellow travelers! If you are headed on a trip there yourself, please let me know how you like some of our favorite spots in the comments below!

Ciao!

New Signature.jpg

Materials Matter

I remember the moment I dipped my first high quality watercolor brush in professional grade watercolor. Something was different. All I painted at the time was a simple color swatch, but in that moment my world changed; I fell in love with watercolor.

Now, if you’re at all like me, your biggest concern with taking the plunge and investing in high quality materials has more to do with the cost than anything — which I understand completely (trust me… I’m a pastor’s wife, and let’s just say, we aren’t in it for the money.) But we’re all familiar with the phrase “you get what you pay for,” and this is one of those things where the phrase definitely applies.

When I first started dabbling in watercolor painting, I purchased a cheap set of paint from Michaels, and equally cheap brushes and paper. Though I was enjoying myself, and quickly building my skills through practice, I noticed my work drying “chalky” and the paper warping with just the smallest amount of water. I was discouraged by looking online at all the artists I admired, whose work was so vibrant and flawless. I didn’t realize that it simply wasn’t possible to achieve the same look as the pros without the same tools as the pros.

FullSizeRender 5.jpg

Don’t get me wrong, starting anywhere is better than nothing, but I had no idea how much more was possible with the right materials in my hands. And now that I have seen for myself, I feel responsible to share the same information with you!

So here are my “go-to” supplies, with links where they can be purchased. (These are the same materials that come in my watercolor starter kit — which I’ll talk more about at the end of this post!)

  1. Winsor & Newton Professional Watercolor – This stuff is so so good. I had no idea it was possible to achieve such vibrant color and consistency. You’ll never have an issue with “chalkiness” here, since there are no fillers added to professional grade watercolor. And they are about as vibrant as you’ll find, since the price is relative to the amount of true pigment that has been added to the paint. And even though the price is higher up front, you will notice these paints last much longer. It comes in a tube (rather than dried in a pan already,) and you can usually fill your palette a few times from just one tube. Even with the volume of painting I do, I still only have to refill my palette every few months, so you can imagine a tube can really last you a long time! The important thing is that you fill your palette the day before you’re ready to paint, so you don’t use too much pigment at once. Because the paint comes out of the tube wet, it is easy to pick up too much paint on your brush, and waste it. But when you allow it to set in the palette, all you have to do is “warm it up” with a little water, swish your brush around in the color a bit, and you’ll be ready to paint with vibrant, highly saturated pigments. So hands down, in my opinion, invest in professional grade watercolor. There are quite a few brands on the market, but W&N is my personal favorite. Feel free to shop around and try what works best for you — but just remember: PROFESSIONAL GRADE.
  2. Arches Cold Pressed Watercolor Paper – You can tell just by looking at it when watercolor paper has been made well, and this stuff fits the bill, for sure. The grit of the cold pressed paper is the most important, as that will hold your pigment in place, and allow you to use a good amount of water without it pooling up and drying strange. Be careful when purchasing watercolor paper, because there is hot pressed paper as well, which does not have the same grit and texture as cold pressed paper. Hot pressed paper is great if you’re doing illustrations or simple washes, but because of the texture of the paper, paint tends to dry much more quickly and it doesn’t hold layers as well. Cold pressed paper is most often used by watercolor artists, and the only way to go in my book! Another element to look for when purchasing watercolor paper is whether it is 100% cotton. This is important, as many cheaper brands will use fillers that make them less strong, and they will not hold your paint quite as well. Finally, when purchasing paper, you want to look at the weight. You do not want to work with anything less than 140lb./300gsm, to avoid warping paper. If you know your painting will require a heavy amount of water, you might want to invest in some 300lb. paper, which will hold a lot more water without warping. A few other brands I would recommend trying out include: Legion Stonehenge AquaFabriano Artistico,  Winsor & Newton Professional Watercolor Paper, and Global Fluid 100 (as a cheaper, yet still good, option.)
  3. Princeton Heritage Synthetic Sable Brushes – These are a little bit of an investment, so I actually recommend starting with their introductory “Snap!” brushes. If you are used to cheap watercolor brushes, switching to the Snap! brushes will be a HUGE upgrade. They will hold a lot of water and pigment, and you’ll be amazed at the versatility of the round brushes! Starting with sizes 6 and 16 is a great place to begin. After a few months of practicing with good paint, good paper, and good brushes, upgrading to the Heritage brushes and adding a smaller size round brush to your arsenal will give you the ability to add finer details, and now that you’re a pro, you’ll be able to notice the difference between the Snap! series and the Heritage series.
  4. Watercolor Palette – A palette with space for mixing is a must. Personally, I use this palette, as I have collected a lot of different pigments I regularly use. But beginning with something smaller, and just a few different pigments is where I began, and a great place to start if you’re budget conscious. It is important to remember that watercolor is meant to be mixed. So even if you start with only 8 paint colors, you have the potential for creating at least 64 different colors with those alone! As you paint more and more, you will start to recognize patterns, and colors that you gravitate toward mixing often. That is when I recommend starting to pick up new pigments. That way, they will be a little more vibrant, since they are pure colors, and less mixing work for you.
  5. Watercolor Pencil – Something I did not know when I first started using watercolor is that pencil cannot be erased once it has been painted over. So if you’re laying out a project, but don’t want to see the pencil marks afterward, a little trick I like to use is a watercolor pencil! I use a very light grey for most projects, just as a guide, and because it is watercolor, it basically dissolves into your painting as you add water. Just be careful not to write too dark with it. Since it is real pigment, it could change the color of your painting if you use too much.

So there you have it — my favorite supplies, and the WHY behind them. If you’re convinced, and ready to try out some of the “good stuff” for yourself, I have listed links for where each of these items can be individually purchased. However, if the idea of navigating it all for yourself is a little bit daunting, I have made it really easy for you with my Watercolor Starter Kit!

IMG_0743.JPG

The kit comes with a starter palette, already filled with my 7 favorite pigments, (which will last you at least 2-3 months of regular painting,) sheets of Arches cold pressed paper, and Fluid 100 cold pressed paper, a watercolor pencil, 2 Princeton Snap! round brushes (in sizes 6 and 16,) and an instructional booklet, (written by me,) with more details about the supplies you’ve received, an introduction to the basics of watercolor, and a step-by-step lesson in loose floral painting. With all the supplies you receive, and the instruction included in the booklet, this is a great investment!

More than anything, I hope you understand my passion for watercolor runs deep. This beautiful, therapeutic art has been healing to me in so many ways, but has also opened doors to opportunities I never thought possible. It wasn’t easy to start, and it didn’t come natural from the beginning, but with practice, and the right tools in my hands, I have come a long way (and believe you can, too!)

If you have any other questions about materials I didn’t cover in this post, please feel free to comment below!

Good luck on your own watercolor journey,

Signature.jpg

A Few of My Favorite {Wedding Stationery} Things

It’s 2017 (which I still find hard to believe) and just like every other year, our refrigerators have begun to fill with save-the-dates and invitations to witness one of the most beautiful moments in life. Two people professing their love for each other, and a commitment to share their lives together, forever. In my mind, there are few things more captivating than the look on a groom’s face when he catches that first glimpse of his bride in her wedding gown.

As a calligrapher, I’ve felt the impending wedding season since the beginning of January, as custom requests began to flood in, and clients began to check my availability for April (a very popular wedding month this year.) And in the midst of all the preparing and brainstorming to help make their dreams a reality, I have noticed a few trends that I wish I had known about when I got married – because they are absolutely gorgeous ways to make your invitations more unique. And don’t worry if you’re on a tight budget (because who isn’t?) Simply adding one or two of these special elements can make a big difference.

So get ready to have some serious stationery envy — here are five of my favorite wedding stationery trends, that can take your invitations to the next level:

1. Vellum Envelopes – This is one of my favorite trends at the moment, possibly because of how fun it is to write on vellum, but also because it is just so stunning. Almost any ink color stands out beautifully on these envelopes, and the see-through nature of vellum gives a little teaser to what is inside, without totally giving away the surprise. This is an “upgrade” that does not add to much to your overall cost, but provides a huge “wow factor.”

fullsizerender1.jpg

2. Handmade Paper – Fundamentally speaking, your invitations will only be as beautiful as the paper you use. And from the moment your guests open their hand-addressed envelope, they will no doubt be taken aback by the unique look and feel of handmade paper.

Handmade Paper by Share Studios. A paper company featuring the work of Maker, Stephanie Hare. Located in the state of Maine, Stephanie produces beautiful, handmade paper from Kozo fibers (bark harvested from the Paper Mulberry Tree.)

Handmade Paper by Share Studios. A paper company featuring the work of Maker, Stephanie Hare. Located in the state of Maine, Stephanie produces beautiful, handmade paper from Kozo fibers (bark harvested from the Paper Mulberry Tree.)

3. Wax Seal –  The next design element I’d recommend (which I am pretty obsessed with these days) is a wax seal. This is another great way to make a big impact, with an element that can still be used for things like Christmas cards and baby announcements, once the wedding festivities have ended. In my mind, this one is a no-brainer because it is both stunning and cost effective. Personally, I find myself sending more “snail mail” simply for the opportunity to use my wax seal, and I’m sure you’ll do the same.

Get Marked offers a wide variety of wedding themed wax seals (their “carriage stamp” shown above.) They also offer the opportunity to submit your own design for a custom wax seal. 

Get Marked offers a wide variety of wedding themed wax seals (their “carriage stamp” shown above.) They also offer the opportunity to submit your own design for a custom wax seal. 

4. Custom Watercolor Illustration – Another way to add a little bit more of a unique touch to your invitations is by adding a few custom watercolor elements. From envelope liners, to custom crests, and illustrated maps or venues, adding a few touches of custom watercolor illustration will mean your invitations are not just unique to you, but they truly reflect you as a couple, and what guests can expect for your special day.

Venue card designed and painted by Aria Paperie.

Venue card designed and painted by Aria Paperie.

5. Silk ribbon – And now, since you have taken such care in each individual element, it’s only necessary that you bring it together with the same level of care – and silk ribbon is, no doubt, the way to go.

Honey Silks Co. is a creative silk ribbon company, offering a beautiful assortment of hand-dyed silk ribbon.

Honey Silks Co. is a creative silk ribbon company, offering a beautiful assortment of hand-dyed silk ribbon.

So there you have it, my friends. Five of my favorite trends in stationery, that are sure to bring the “wow factor” to your invitations.

If you’re currently in the midst of planning your wedding, do your best to enjoy it!  It really can be a fun process if you don’t get too carried away. Because the truth is, even if everything goes wrong, the most important thing at the end of your big day is that you will be married and you get to share life together, forever.

Much love

Signature.jpg